


|
Paper WaterfallMake your own homemade Paper Waterfall! There are two versions of this craft: an easier (less messy) version for younger children, and a more involved, challenging version for the older children that uses real water! this is a great craft for learning about countries that have famous waterfalls, Like Venezuela - home to the Angel Falls, the tallest waterfall in the world!
Ages: 7 and Up Scroll down to the bottom to see the instructions for the easy (and less messy) version.
Here's what you'll need... • Printed Waterfall Coloring Page* (this will work best if your waterfall is printed on heavy paper like construction paper or cardstock). * Instructions for template: The template will open in a new window; close this window when you are done printing to return to the activity page. You will need Adobe Reader to open the template. If you do not have it you can download it for free here. 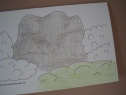
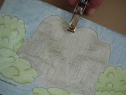
Here's how you make it... At the end of this craft you will have a folded piece of paper, wrapped in a zip-lock bag, with a straw running through it - a small baggie attached to the straw to pour water into and make your waterfall work. 1. Fold your printed waterfall picture in half and color it! Folding the picture in half will let it stand on it's own!
2. Take out your gallon-sized zip-lock bag. Trim off the excess bag that is above the zipper part (this is so your waterfall sits evenly). Be careful not to cut out the zipper part!
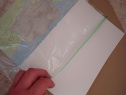
3. Place your colored waterfall inside the bag and seal it.
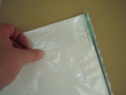
4. There will be a little bit of excess bag at the side of your paper. Fold it over and tape it on the back.
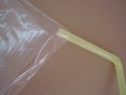
5. Fold your paper-filled baggie so that the waterfall faces the front. With a hole punch make a hole in the stone where you would like the water to come out - Punch the hole through both sides.
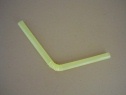
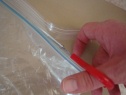
6. Cut your straw so that the flexible part is in the middle.
7. Cut a small hole in the corner of a sandwich-sized baggie, insert the straw into the hole and tape to secure (this is an easy "funnel" in which to pour your water through).

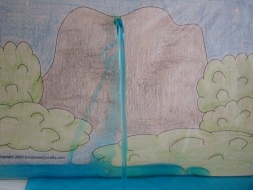
8. Insert your straw into the holes in your waterfall. Pour water in to baggie and watch your waterfall appear! Just make sure you have something underneath to catch the water if you're not doing this outside! We added some blue food coloring to our water, but be careful... it can stain!
Easy VersionAges: 4 and Up
Here's what you'll need... • Printed Waterfall Coloring Page* (this will work best if your waterfall is printed on heavy paper like construction paper or cardstock). 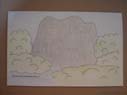
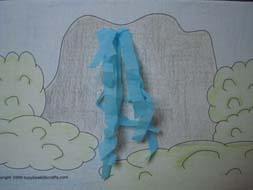
Here's how you make it... 1. Color your paper waterfall. Fold it in half so that the blank side is at the back and it stands up by itself.
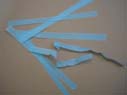
2. Cut strips of blue tissue paper. We scrunched ours a little bit.
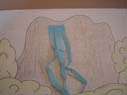
3. Glue strips of tissue paper onto your rock where you want your waterfall to be. Stand it up and enjoy!
The Busy Bee BUZZzzz |


|