


|
Floating ToriiThe Floating Torii in Japan is the entrance to the famous Itsukushima Shrine. This is a fun and creative Japanese Craft for kids, and very easy to make with our printable template! Ages: 6 and Up
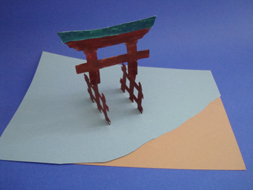
Here's what you'll need... • Printed Floating Tori* to color. This is best done on sturdy paper like card stock * Instructions for template: The template will open in a new window; close this window when you are done printing to return to the activity page. You will need Adobe Reader to open the template. If you do not have it you can download it for free here. The famous "floating" torii at Itsukushima Shrine on the island of Itsukushima in Japan. The torii is the entrance to the shrine so it sits in the water (hence why it is called a "floating" torii). basically you will need to color and cut out the torri printable, secure it on the paper with the tabs at the bottom, and then slide the top of the torii into the cuts made along the two bottom "fences". These step-by-step instructions will help: 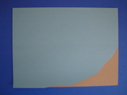
Here's how you make it... 1. First prepare the base for your torii by cutting around one corner of a piece of ocean blue paper and gluing it to a brown, sandy, piece of paper. (You can also just use a piece of blue paper and not put in the sandy shore.)
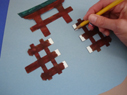
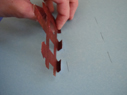
2. Cut out and color your floating torii, you will see two rectangular tabs at the bottom of the two "fences". These tabs will be folded to secure onto the paper. Cut down the two dotted lines. The frame is generally wood colored and the roof is teal, like old copper. 3. Place your torii in the water where you would like it to be. With a pencil draw lines underneath the tabs of the "fences".
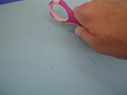
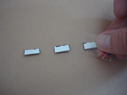
4. With scissors or a craft knife make cuts over top of your pencil lines.
5. Crease your tabs and then slide them into the slits on the paper so that the fences stand up.
6. Turn the paper over and glue or tape the tabs in place. If you want to make this craft easier just glue the tabs in place on top of the paper instead of having the use the scissors - it won't look as authentic or neat, but it will certainly work just fine.
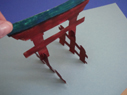
7. Slide the top of the torii into the slits in the bottom two "fences" your torii will now be floating in the water.
The Busy Bee BUZZzzz Find more Japaese Crafts for Kids like this Floating Torii Craft |


|